Pages

Thursday, February 26, 2015

Treat Holders for St. Patrick's Day

This post didn't appear earlier this week, either!   Obviously, I am technologically challenged when packing for a vacation!


The tutorial for these cute, cute treat holders comes from Splitcoast Stampers and is very simple to do, except that I found the measurements a little bit off.  After folding the 6 inch square into a triangle, I scored at 2 and 3/4 inches along the long edge, flipped the triangle over and scored again at 2 and 3/4 inches.


The shamrock was cut on my Explore and I tucked a 'gold' coin in one of the pockets.  The pockets hold a Ghirardelli chocolate perfectly!   Love this design!   Thanks for visiting with me today.  Now to get the washing machine going!  : ) Christine

Happy Birthday Shaped Card - file

We're back - regretfully - from our little trip to The Wizarding World of Harry Potter at Universal Studios and it was amazing! 

Trying to catch up with my emails and I'm sorry the link did not work. Hopefully this link WILL work!   : )  Christine

https://us.cricut.com/design/#/canvas/25199486


Saturday, February 21, 2015

Happy Birthday Shaped Card


I am having so much fun with the BBTB2 shaped card challenge!  I learned, with this one, to make sure that ALL the pieces of the shadow are welded together!  The sentiment comes, once again, from Wild Card 2.


I have to say that the new Design Space is amazing.  I wanted to cut the pieces of the card first and then the embellishments - the candle, gift, balloon and hat.  It was SO easy to select the mats I wanted to cut first without the tedious scrolling I had to do with the previous version.  DS marked with a check mark all the mats I had cut and revisited the ones I had skipped so that all the mats were cut without me worrying about them!  Thank you Cricut!

Here's another view on the window sill so that you can see the glitter.  (Thank you Miss E!) 


Thanks for visiting with me today and don't forget to check out the BBTB2 challenge.  : )  Christine

The file for this card can be found at https://us.cricut.com/design/#/canvas/25199486

Thursday, February 19, 2015

Shaped Thank You Card

I haven't been able to enter the BBTB2 challenge for a while and was determined to do so when I saw this weeks challenge - create a shaped card.  I was in need of a simple thank you card and went in search of a chunky 'Thank You' in Design Space to use on my card.  I found 'Thanks A Bunch' on the Wild Card 2 cart and brought it onto my canvas.

Then it was easy peasy lemon squeezy to duplicate the shadow layer and flip it to make the back of the card.  I moved the two images until the T's overlapped and found that I had to add two small rectangles between the two h's and the two k's so that my card would fold.  Here's the welded shape.


Since it said "Thanks a Bunch" I chose to embellish it with rolled flowers cut from the CTMH Art Philosophy cart.  (Wild Card 2 uses bananas wouldn't that would be fun?)  Wild Card 2 has tons of sentiments that can be made into shaped cards, so I can see myself adding a few to my stash.


Pop over to the BBTB blog and look at some of the other fun shaped cards.  I love Brenda's birdcage and Carolyn's Frozen castle.    Thanks for visiting with me today.  : ) Christine

Here's the DS file if you'd like it!  Thank You Card


Tuesday, February 17, 2015

"Toad - ally awesome" Valentine Card

A quick post with one last Valentine card.  This one was inspired by the cute background paper from Doodlebugs, and is a penny slider card from Lori Whitlock's shop.  The 'toad' somersaults from one lily pad to the other - and to my great surprise, it really works!   : )


The toad/frog and lily pads come from Create a Critter and the sentiment stamps are from My Pink Stamper.   Thanks for visiting with me today.   : )   Christine

Friday, February 13, 2015

Mailbox Card in a Box for Valentine's Day

My family will tell you that I never sing the right words to a song.  Never ever!  In my head, however, I'm just being creative.  : )  When I pick up Master J. for example, I always sing "We're going to Grandma's house" to the tune of "Here we go round the mulberry bush."  There are many verses to this song naming the people, animals and things he will see at Grandma's house and lately he's been singing along and inventing verses just as his Mama did when she was a littlie! 

So, when I saw the mailbox box card from SVG Cuts, I wanted to construct real envelopes containing greetings from everyone at Grandma's house but, had to settle for the trusty Explore writing names on the teeny envelopes instead.  Kinda cute though, don't ya think?


Of course, I know that Master J. will be much more interested in the heart shaped box of candy and the Chuggington book that comes with the card.  LOL!  I'll share the rest of the Love Day stuff next week after it's been delivered.  Happy Valentine's Day!  : ) Christine


Wednesday, February 11, 2015

Heat Embossing with the Explore

Oh so excited today - this is my first blog post for Sheila at She's a Sassy Lady!   O.K. Here goes!

Did you see the new Mix and Match embossing plates from Anna Griffin on HSN?  I'm afraid I caved and bought the set AND took the autoship option.  My shipment came in last week and I love how easy it is to customize cards for specific occasions.


It was my DD's birthday last week and I used the Happy Birthday plate to emboss the front of her card.  So pretty, but it needed embellishing to make it really special and I don't have any Anna Griffin type flowers.  Time to turn on the Explore!

I found several flowers in Design Space that have a shadow layer and a fairly intricate top layer.  (e.g. Bits and Pieces, Gypsy Wanderings, Sophie) After placing the flower on the mat, I ungrouped the layers and changed the top one to 'write' and left the shadow layer on 'cut.' The last step is to select and attach.

Using the Amy Chomas adapter, I inserted my VersaMark embossing pen, loaded the mat with vellum and pressed 'go."


Then comes the hardest part of the whole process - getting the vellum flower off the mat without touching the wet embossing ink!  I had fun trying out several different embossing powders and choosing the best alcohol marker to color the back of the flower.


Love this silver one but decided to go with a silvery white opaque powder to compliment the white-on-white look I was going for.  This technique is so easy and I want to try text, a beautiful butterfly, and maybe a poinsettia with a gold edge.   So many ideas!

Here is the finished card.  She was very impressed!  (Sorry!)


Thanks for visiting with me today!  : ) Christine

Tuesday, February 10, 2015

Jumping on the Lip Balm Bandwagon - Valentine Tags

I found some EOS lip balm at my local drug store! Yesss!  The next step was to design a tag to hold the balm that I could attach to our DGD's Valentine Candy.   Two weeks later, after designing and discarding several things, I finally decided on a simple 'Love' theme rather than the flowers, bears, owls and hearts that I've been seeing all over the Internet.

If you need a video tutorial on making a holder, I suggest you pop over to see the one done by Sheila at She's a Sassy Lady.  I followed her directions and used the slice tool to cut out a 1.45 inch circle in all the ungrouped layers.  Easy Peasy Lemon Squeezy!


The 'Love' shape comes from Home Accents, and the 'I heart you' from Create - a - Critter.  The tag is from Bits and Pieces.  And look, Circle Sisters, I finally found some Memory Thread to add to the seam binding bow.  (It is so long since this was in vogue over on the Circle Board that it's due for a comeback!  LOL!)


Don't forget to come back tomorrow to see my first ever DT post for She's a Sassy Lady.  So excited!   Thanks for visiting with me today.  : ) Christine

Wednesday, February 4, 2015

Hello Kitty Valentine

Yesterday was my Card and Craft club meeting and the challenge theme was 'Love Letters."  Our supplies included some cute, cute paper from Doodlebug Designs, sheer ribbon, a bling heart and a pink paper clip.

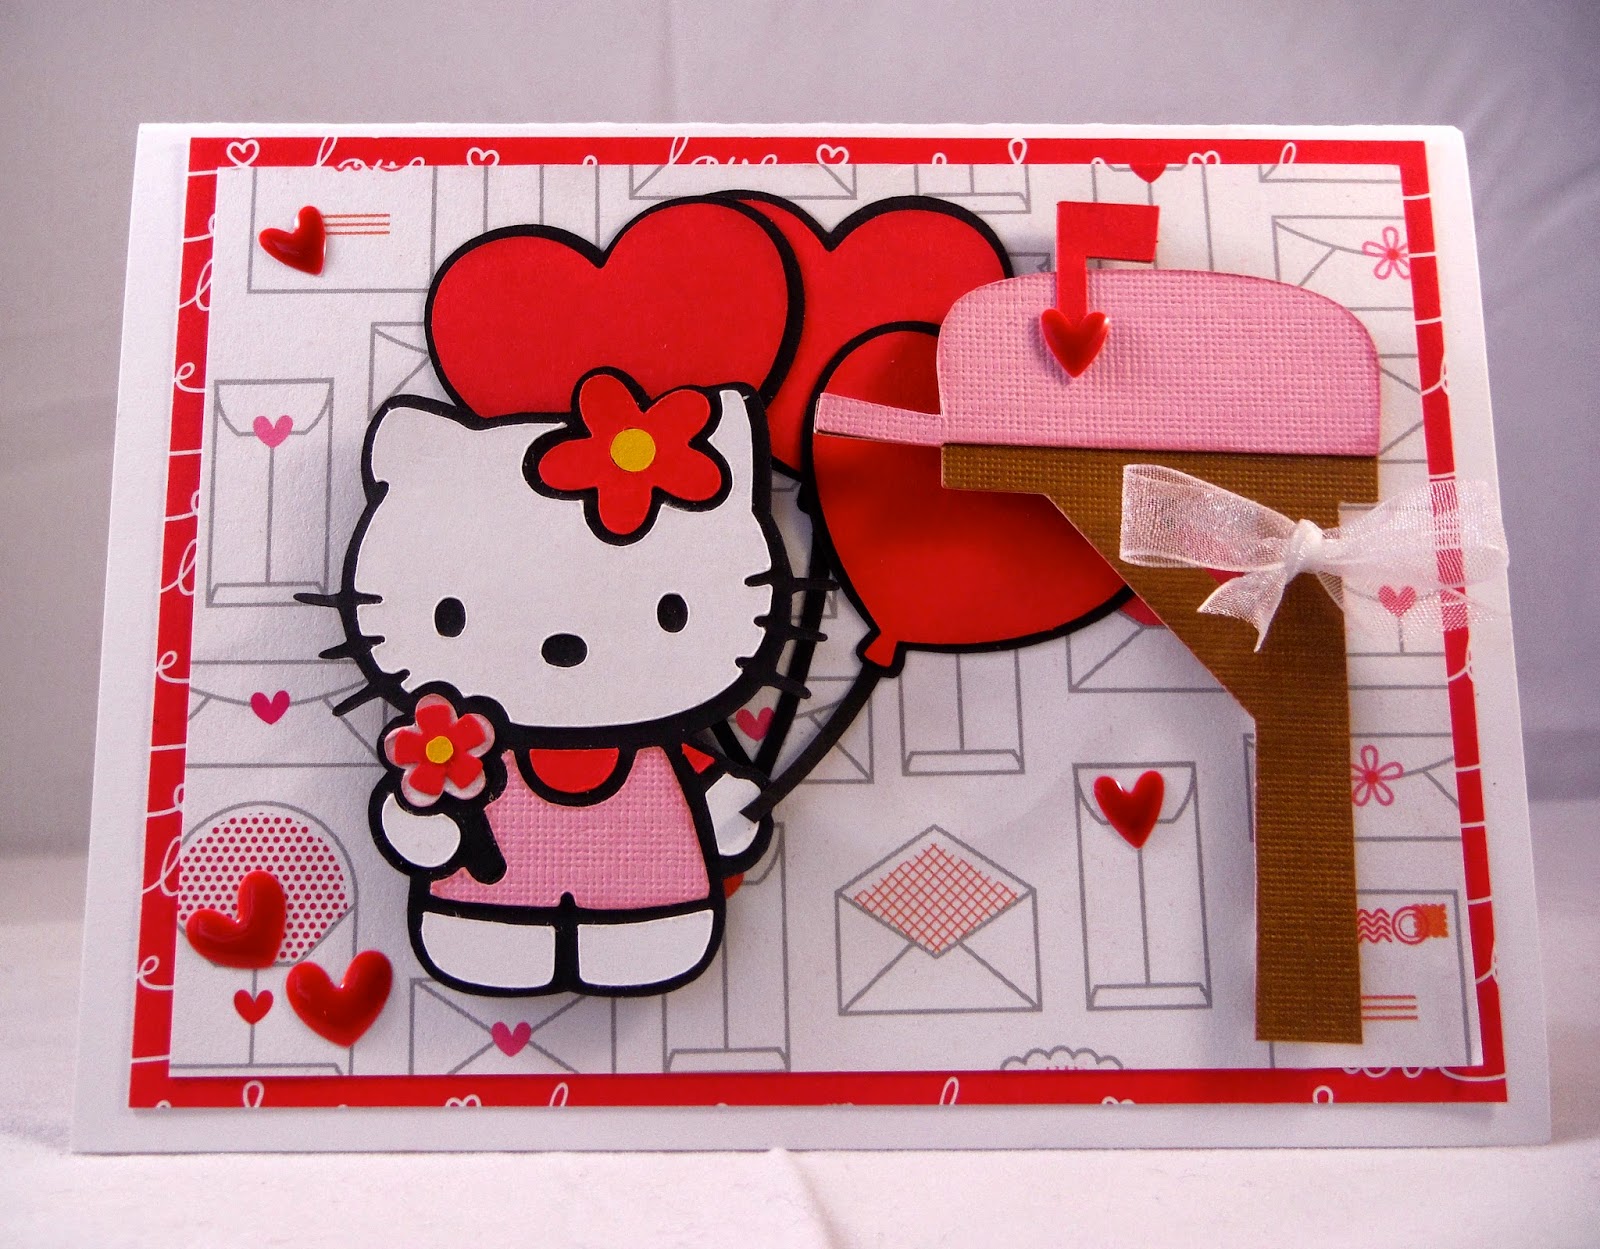
I had several ideas but it wasn't until Master J. told me, mournfully, that his yellow balloon had popped, that the idea of Hello Kitty stuffing heart shaped balloons into a mailbox flashed into my mind.  (As for Master J. well, we drove right over to the grocery store and bought him a mylar balloon, and a car, and some milk to justify going!)

Here's my card.


Of course, the Hello Kitty carts do not have Hello Kitty standing by a mailbox with heart shaped balloons so this image is put together from three other cuts and some creative scissor work.


The sentiment inside comes from the 'Better Together' Imagine cart and I used the 'unflatten' button to separate the layers, then 'hid' the label layers so I could just print then cut the sentiment.  Love it!  (Now I just need to be able to change the colors on the image without obliterating the details.   It's on my wish list for future updates.)


The hardest design element was that pink paper clip and I ended up cutting out one of the envelopes from the background paper and clipping it to the inside.


I am linking my card with the Valentine's Day Challenge # 244 at the Fabulous Cricut Challenge Blog and the Craftin Desert Diva's Red, White and Pink Linky Party.  Pop over for some Valentine's Day inspiration.


And, of course, I had to leave my card in the store for display, so I recreated it last night for my Hello Kitty lovin' DGD, Miss G.  Shhhhh!   Thanks for visiting today!  : ) Christine

Monday, February 2, 2015

DIY Valentine Treat Boxes

Happy Groundhog Day!  It's raining quite steadily, so no-one is going to see a shadow today.  Yeah - an early Spring! 

Time to get the February treats done for the children at OHM and this month, I thought that I would make a heart shaped treat box.  This one comes from SVG Cuts and I sized it so that 4 would fit on a 12 x 12 sheet of cardstock.   To speed up the process of putting the boxes together, I used narrow double sided tape rather than glue. 


The hard part for me was my decision to include a variety of stickers with the boxes and let the kids decorate their hearts for themselves,  Aggghhh!  Bling withdrawl!  


You can see that I could NOT leave them entirely plain, and added a punched border, and a conversation heart saying written by the Explore on a banner.


Now I need to run to Michael's for more clear bags. ( I don't think for one moment that that's all I'll get, though.  LOL!)    Thanks for visiting with me today.  : ) Christine
 
Blogger Template By Designer Blogs